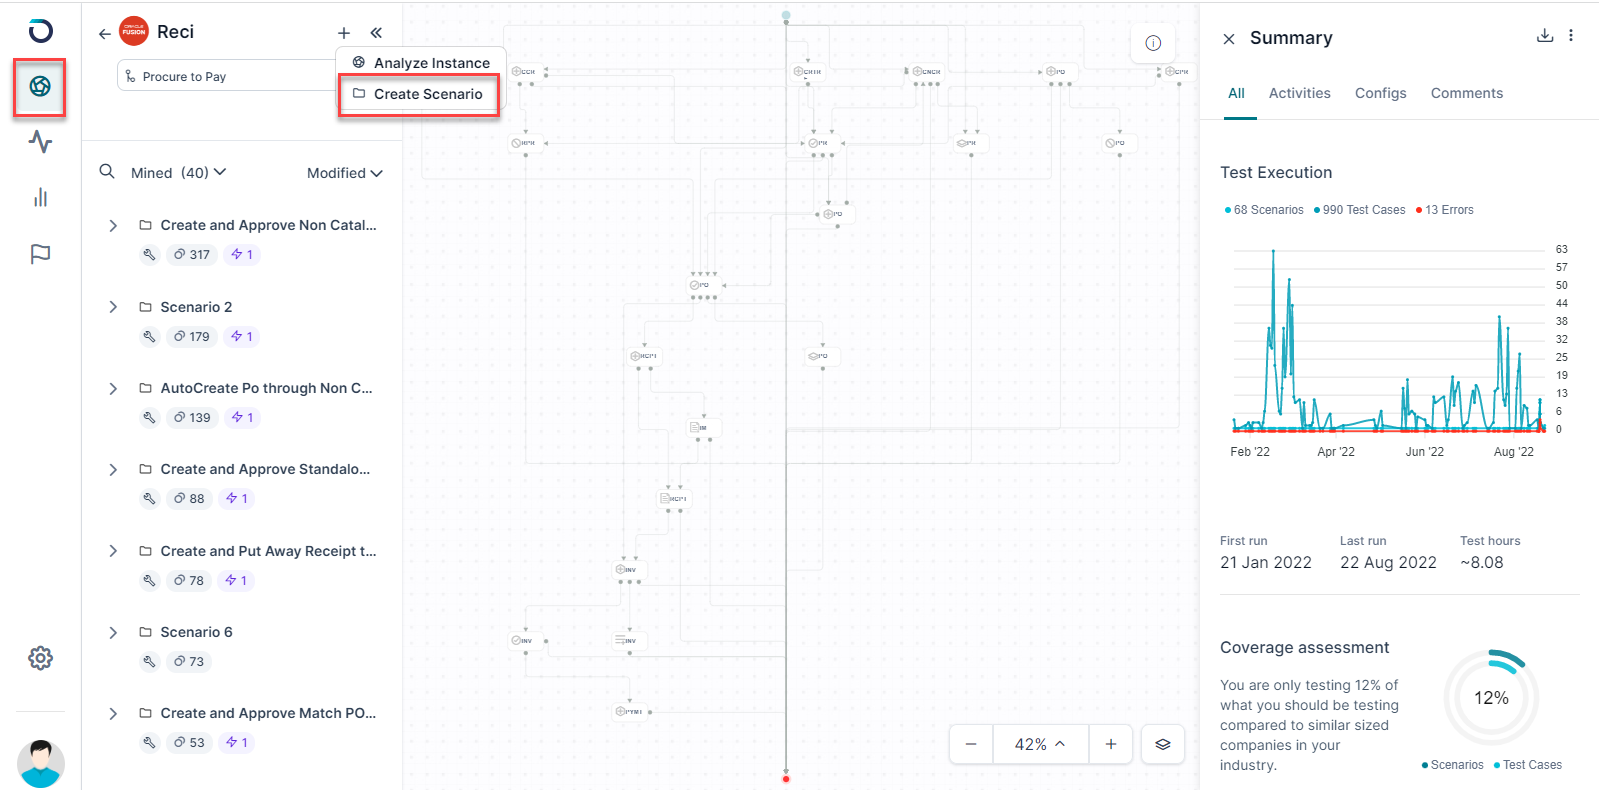
Create Custom Scenario
Users can create customized scenarios according to their requirements. For that, click on the Create Scenario button under the Analyze tab.
You need to provide a name for your scenario and click on Create.
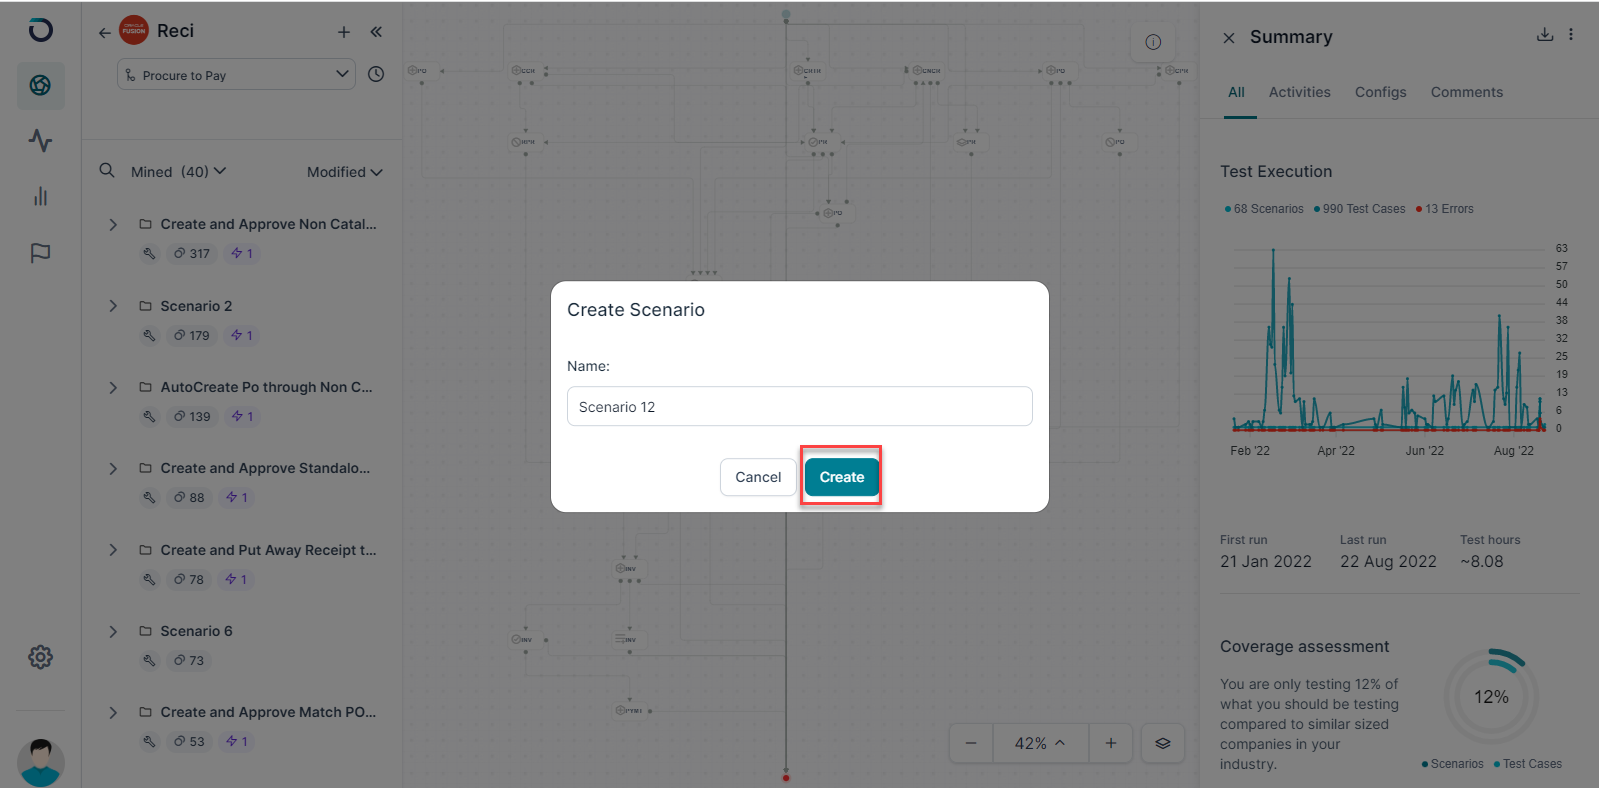
It will create a new scenario, where you can manually drag-drop the a New Activity between the LOGIN and CLOSE nodes in the flow to create your own custom scenario.
On adding a new activity you can view as below.

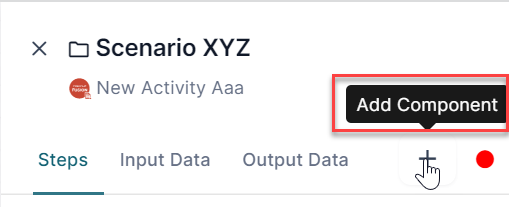
When an activity gets added, you need to Automate it. This can be done in two ways.
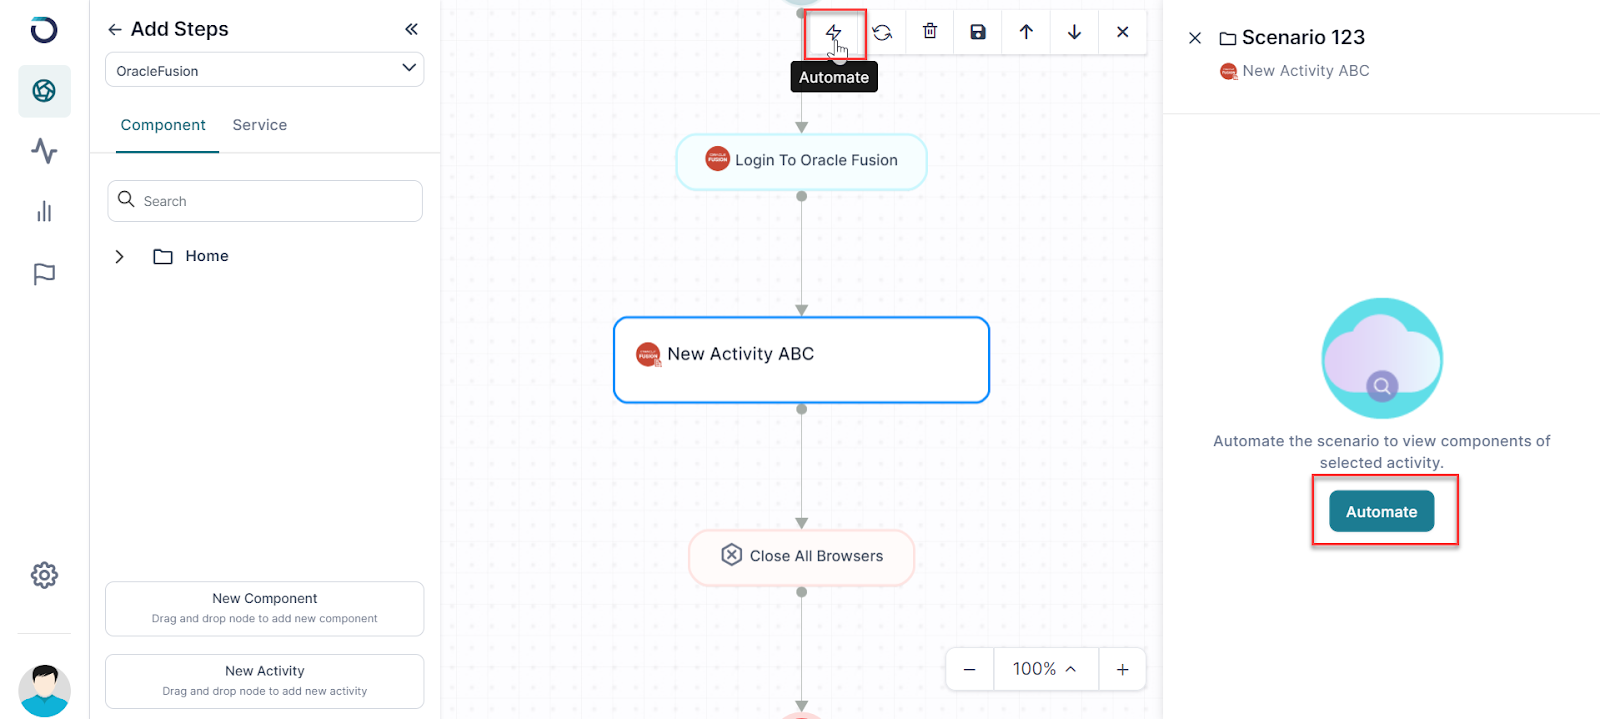
You can either click on the Automate button on top of the middle segment or you can also click on the right hand side panel button as shown in the image above.
Unable to attach gif here
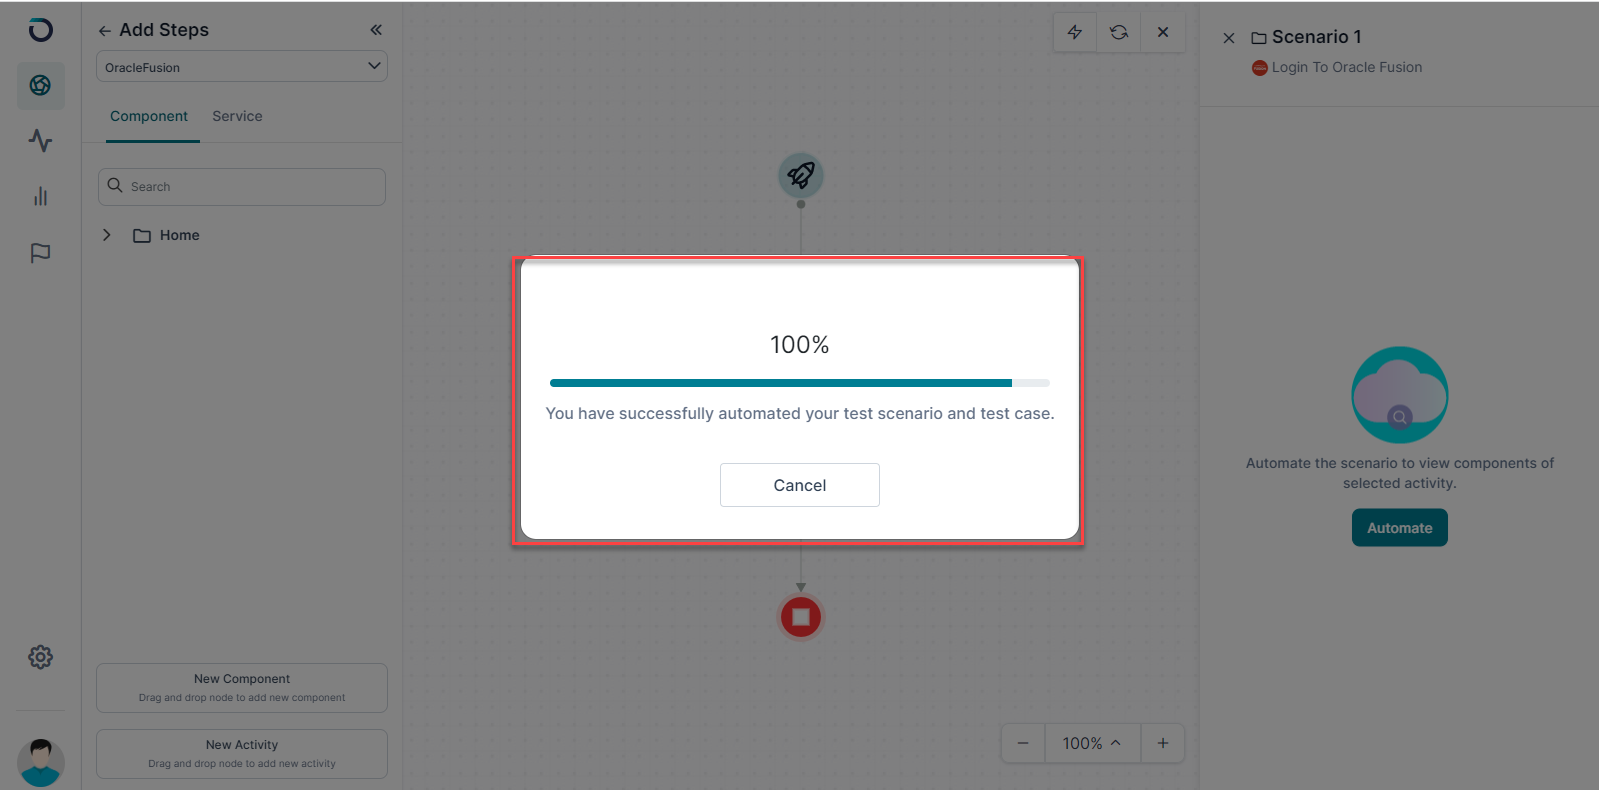
Post automating the New Activity, you can add a new Component or an existing Business Component by drag and drop and can also rename it.


The added Component can be seen as shown in the image above.
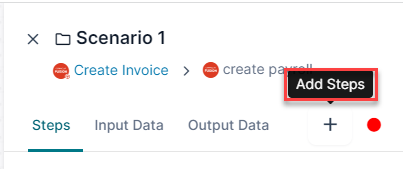
A new Component can also be added inside an Activity by clicking on the “+” button from the right pane present next to the Output Data.
This “+” button can be seen once you have added a New Activity.
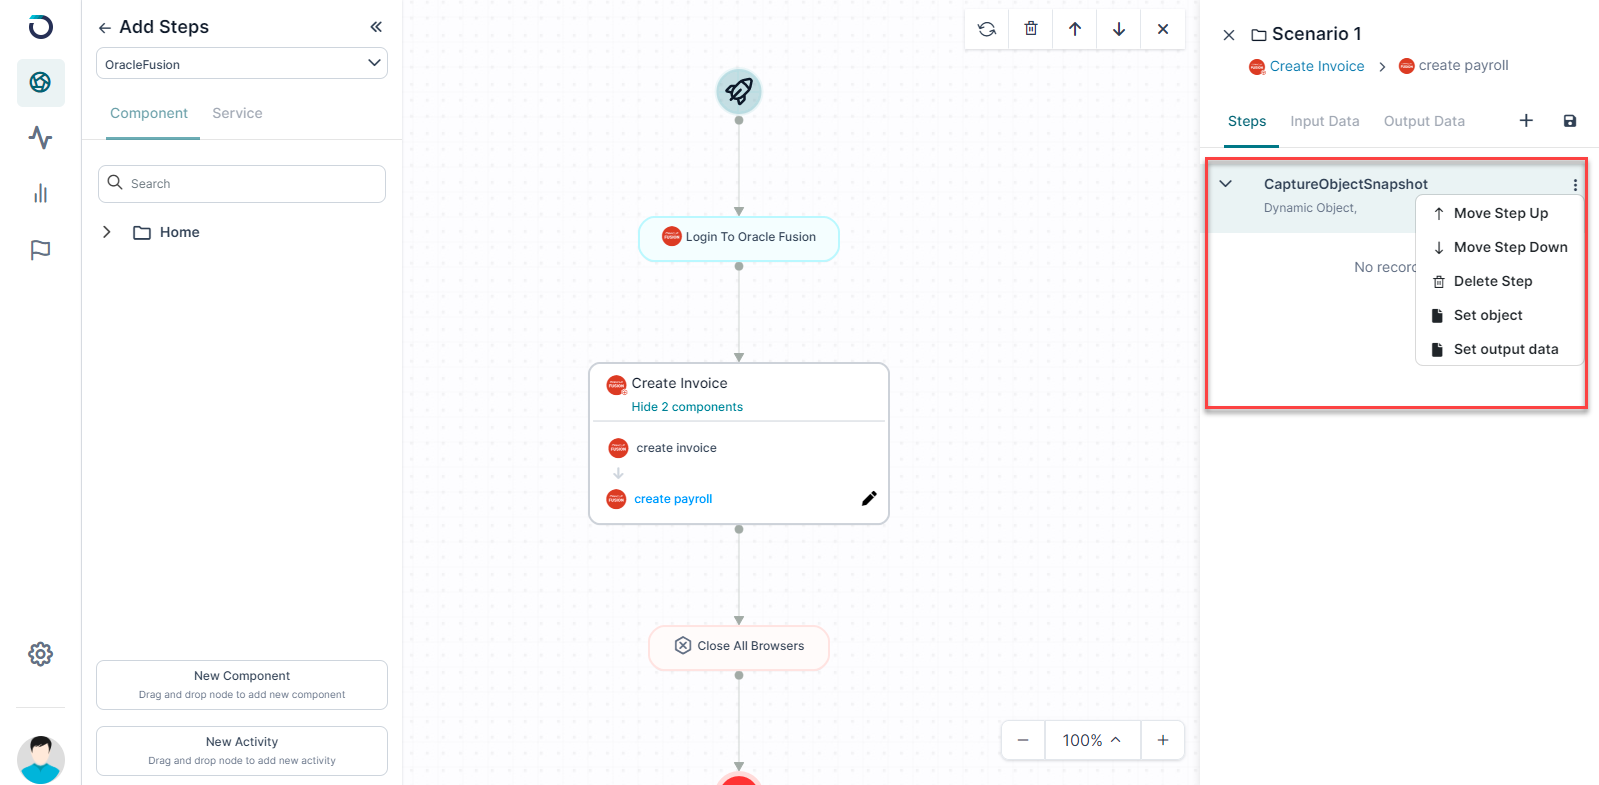
To add Steps inside the newly added Component, you need to select the respective Component.
There are three tabs present on the right pane, which you’ll be able to view on selecting the respective component.
Let us discuss them one by one:
- Steps
The available steps in Opkey can be selected and added as steps.
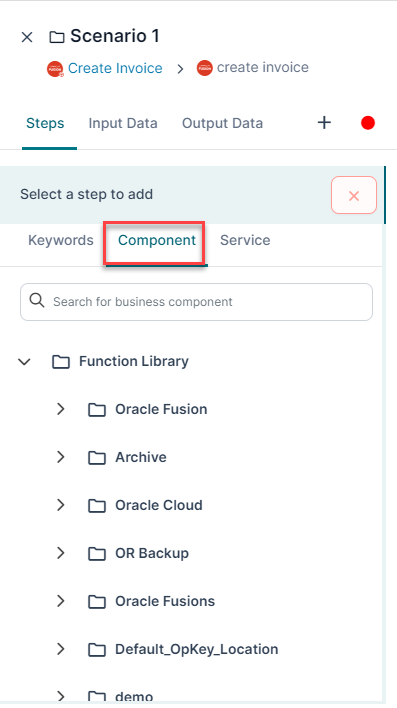
To do so, you need to click on the “+” button.
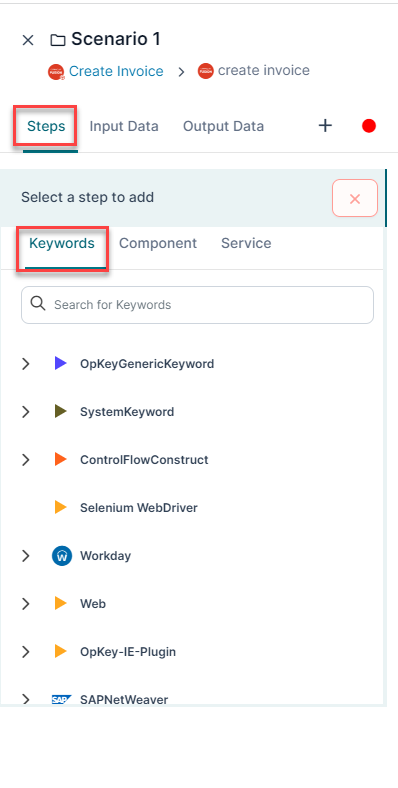
You’ll be displayed with three tabs:
Keywords
Components
Service
1.Keywords- You can add the Opkey keywords by selecting from the list of available Keywords.
Once the Step is added, it can be seen as in the image below.
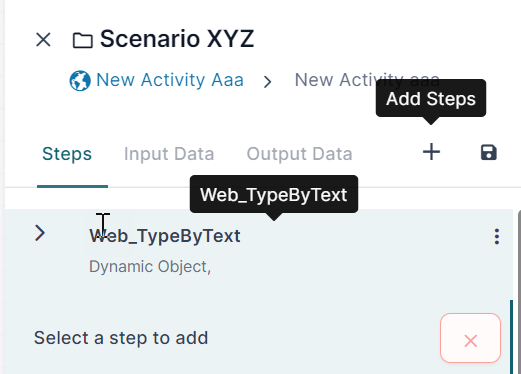
You can adjust the keyword’s position according to the requirement by clicking on the three dots present next to the keyword. You can also Delete the Step.
The steps in the component can also be added via Recording. You need to click on the Recording button present on the right pane.
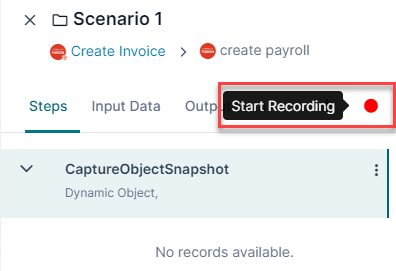
Once you click on the Start Recording, it will begin recording the required steps.

You can stop the recording button once all the required steps have been added to the script.
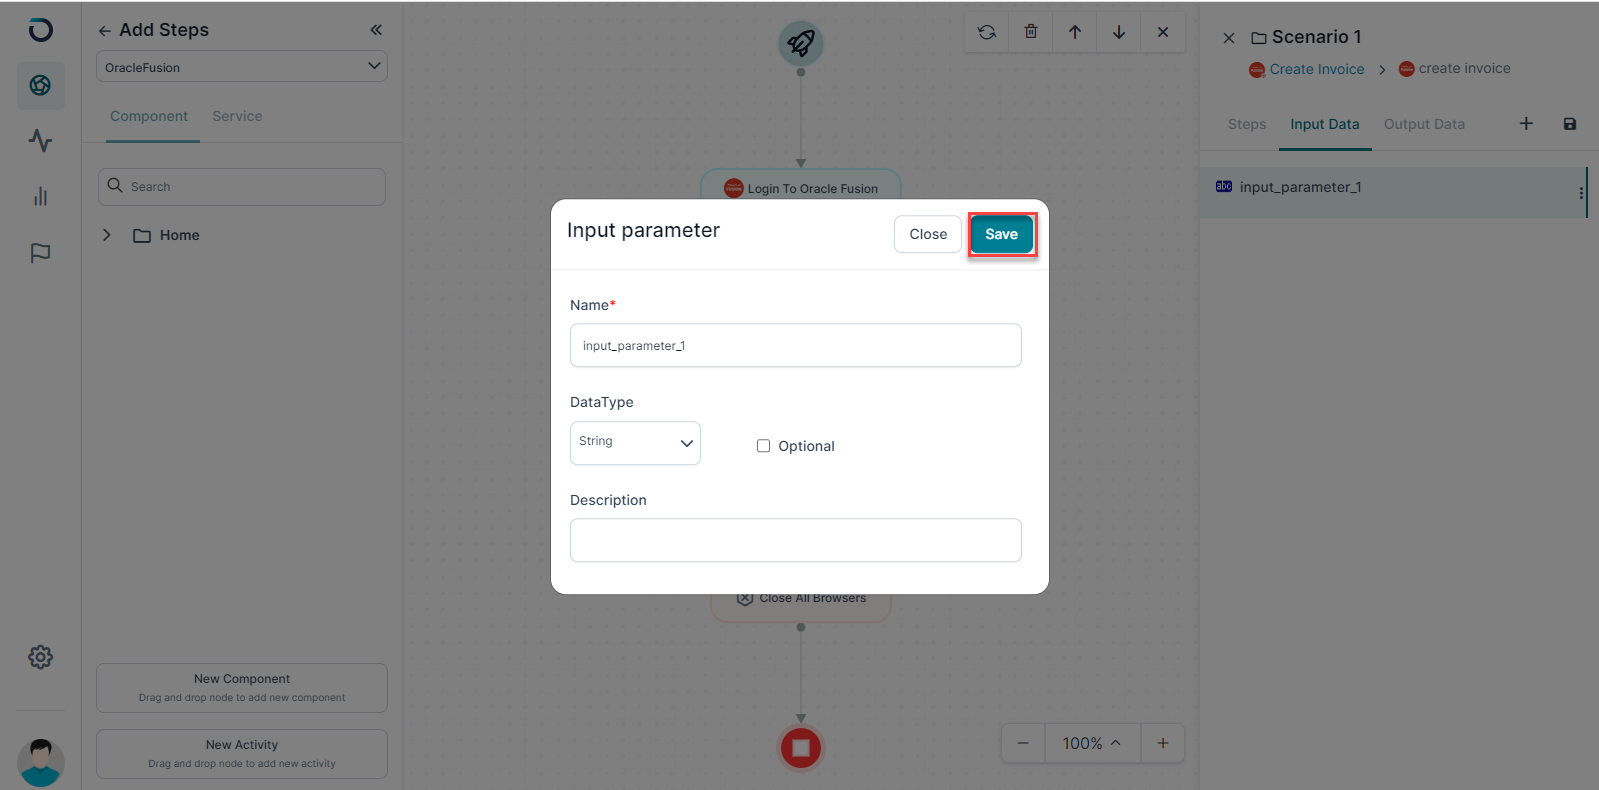
When the Step gets added, you can Set Input Data by clicking on the three dots present in the right corner of the added step.
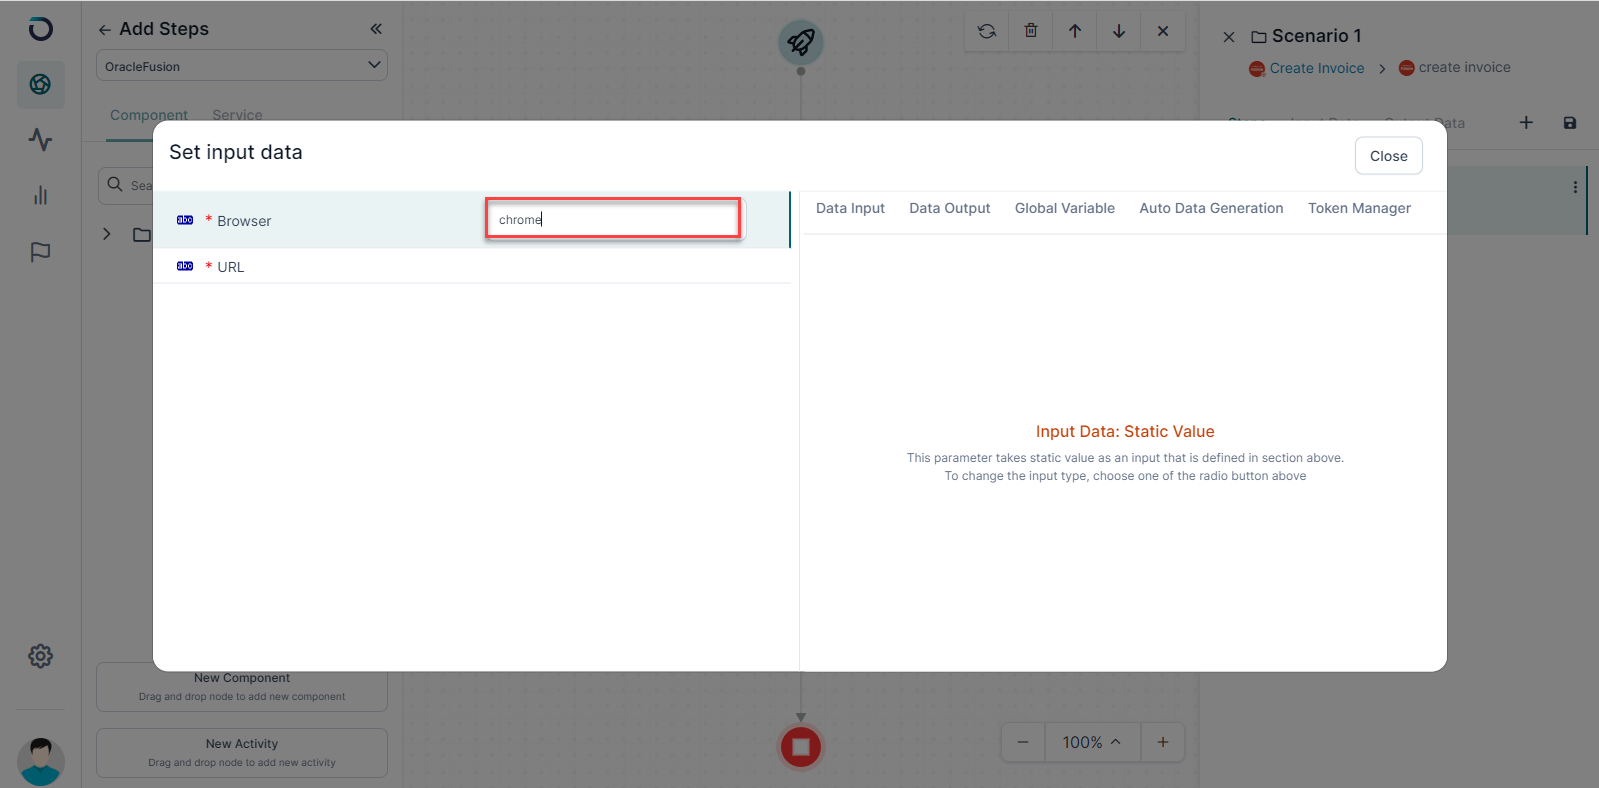
You can add Input Parameter in the added steps.

Once the Input Parameter is added you can Edit it to change it.
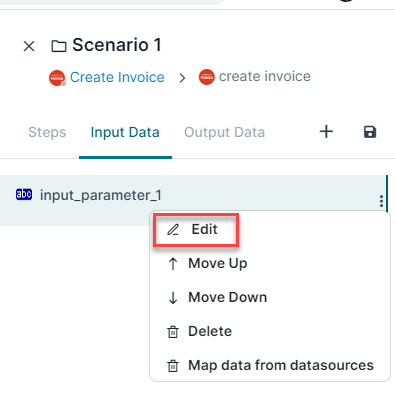
On clicking the edit button of the Input Parameter, you can enter the required data and Save it.
Similarly, you can also add an Output Parameter and Save it.
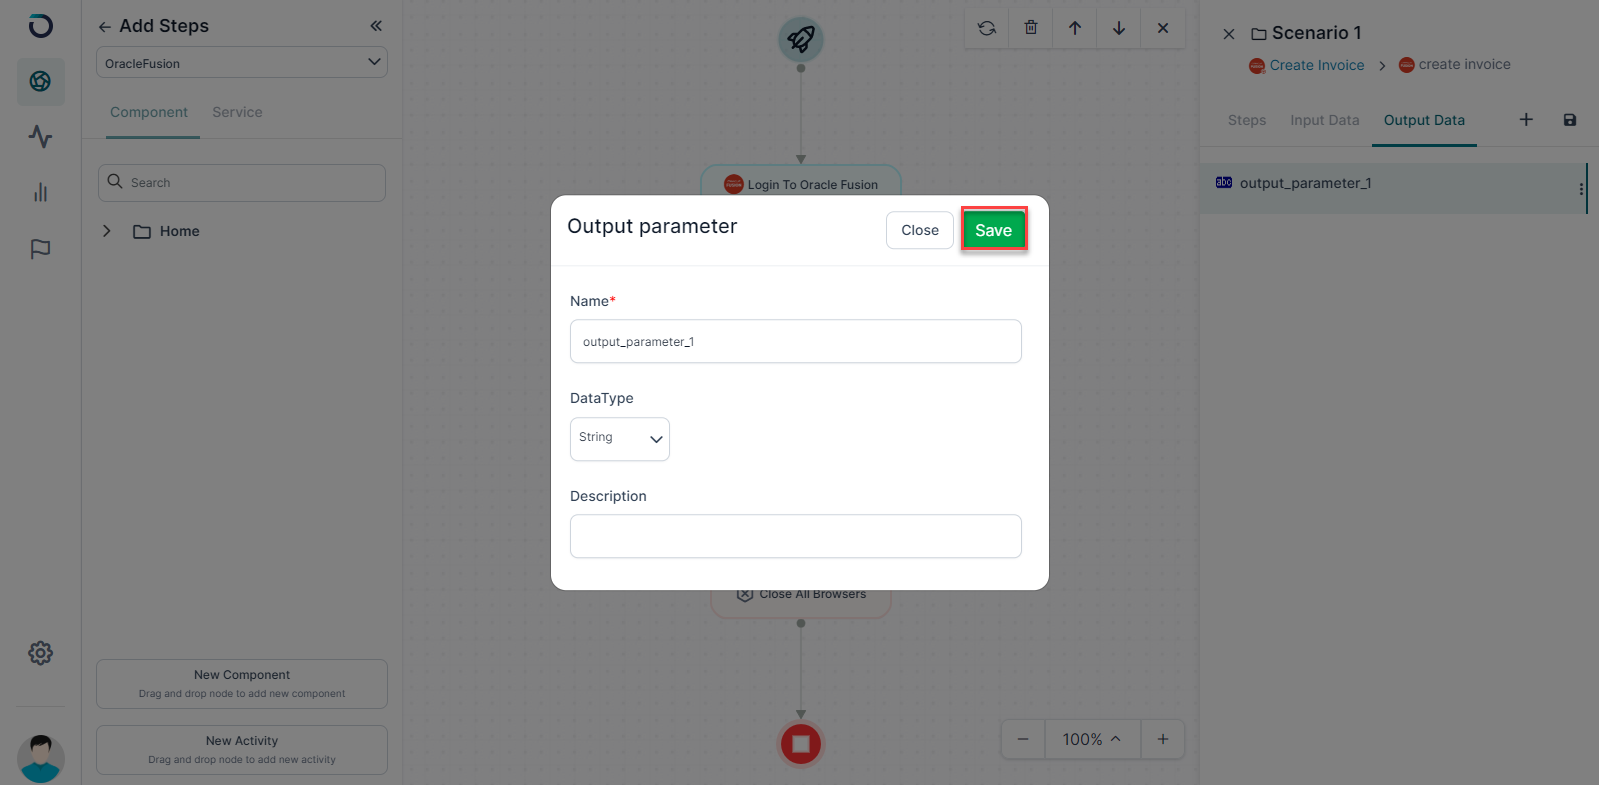
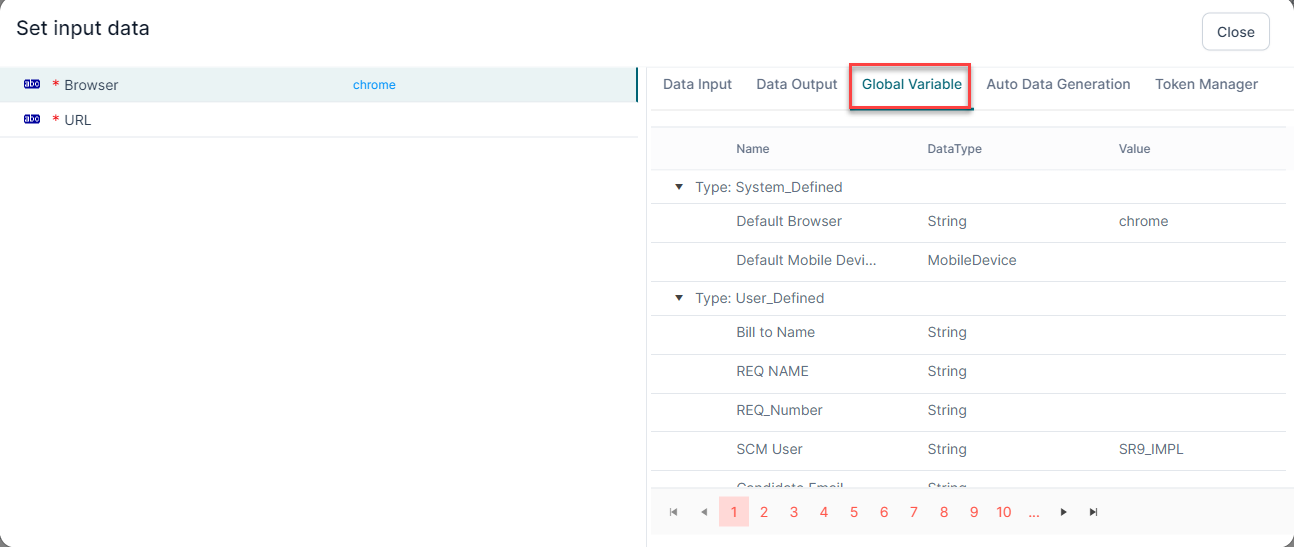
You can also add details to the data through Global Variable, Auto Data Generation and Token Manager through it.
In addition to steps, you can also add Business Components to the Scenario.
You can also add Services in the Step from the Service tab.
To create scripts of any other application, you need to click the Components tab on the right pane.
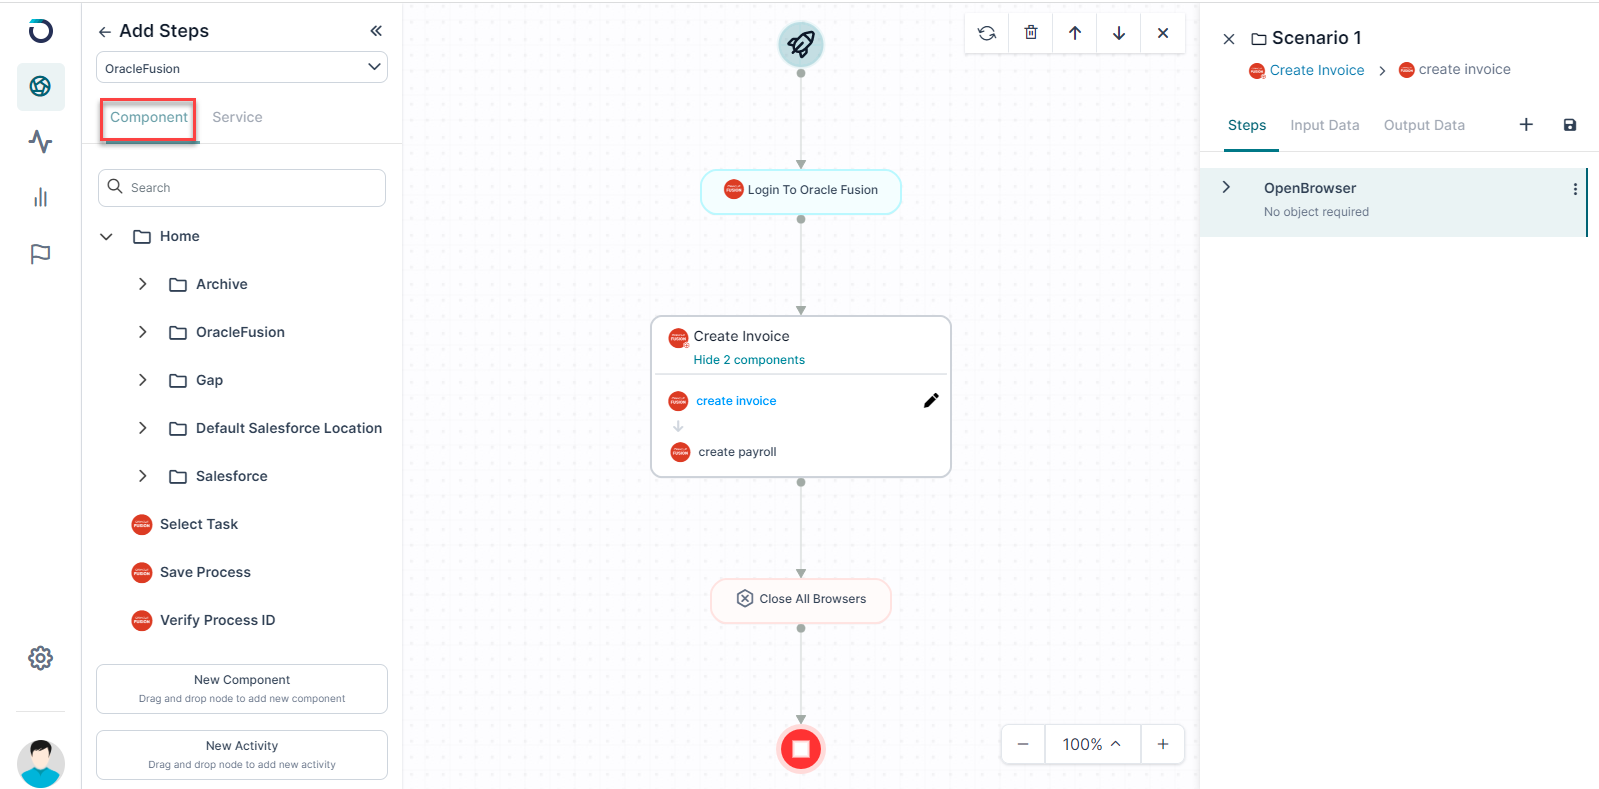
You can drag and drop the component from the available data. Or you can use the existing component of Opkey Surge with the available tags.
The section following is for Open Tickets.

On expanding you’ll be able to view the category of tickets.
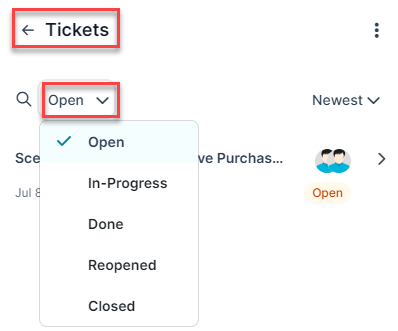
You can select the required category to proceed. On expanding it, you’ll be redirected to a new page.
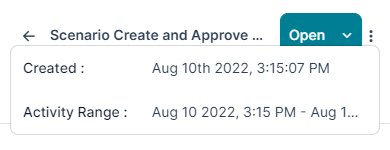
Here you can view the selected category of the tickets followed by three dots which provide you with the Ticket Creation date and time.
It also has activities ranging from the start date to an end date.
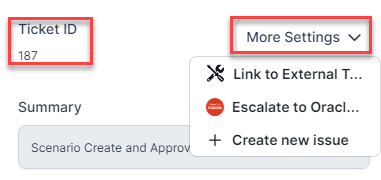
It is followed by Ticket Id and More Setting.
The next tab is Data.
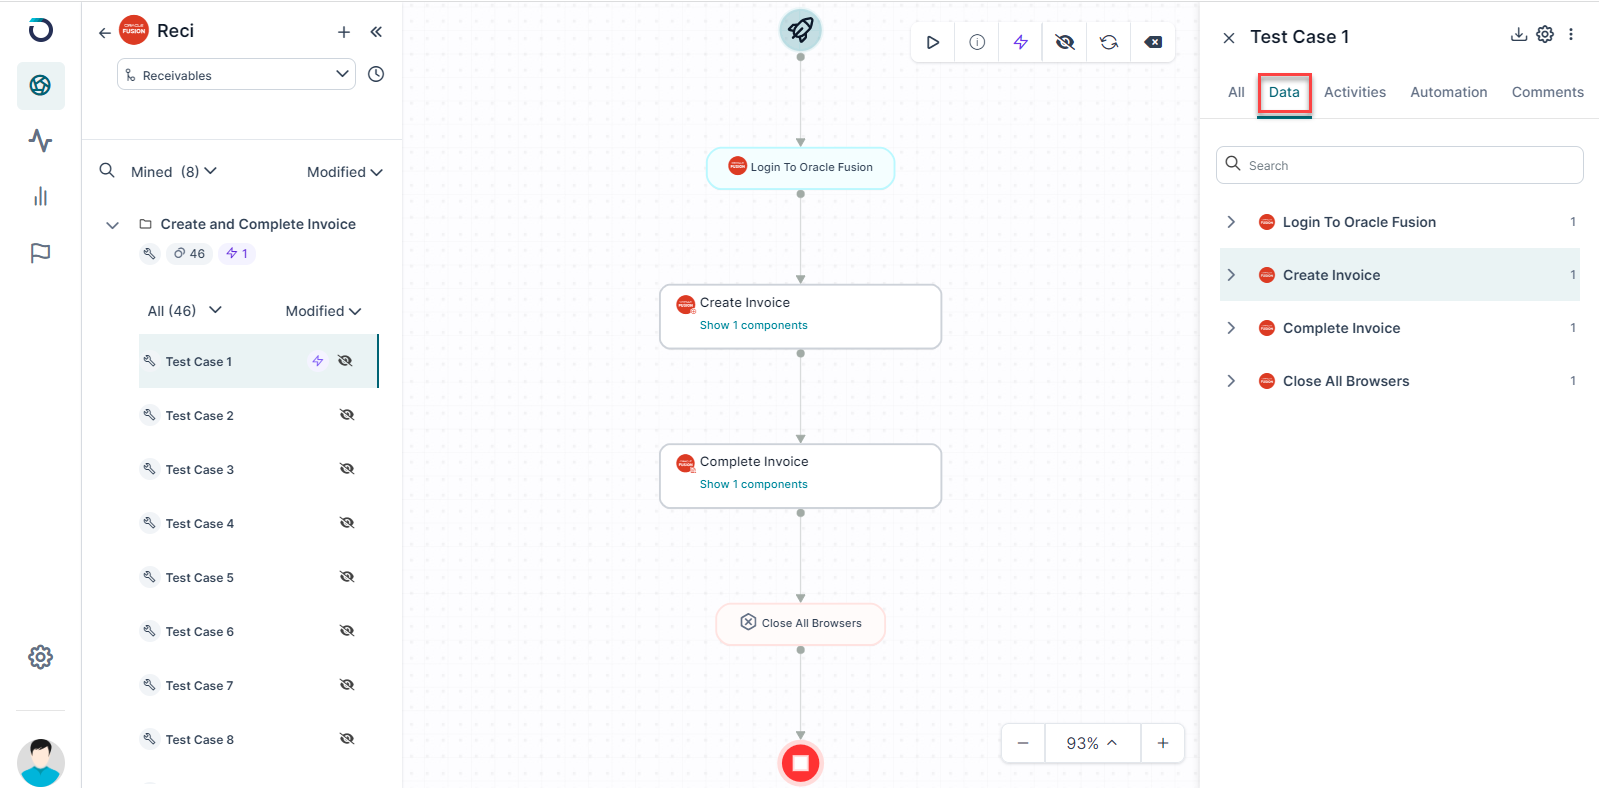
It will have all the processes comprising modules and test cases. On expanding the processes further you’ll be able to view them.
The following tab is of Activities tab.

This will display the date on which all the activities have been performed for the creation of processes and modules.
The tab following is Automation which will let you know about the Run activity performed.
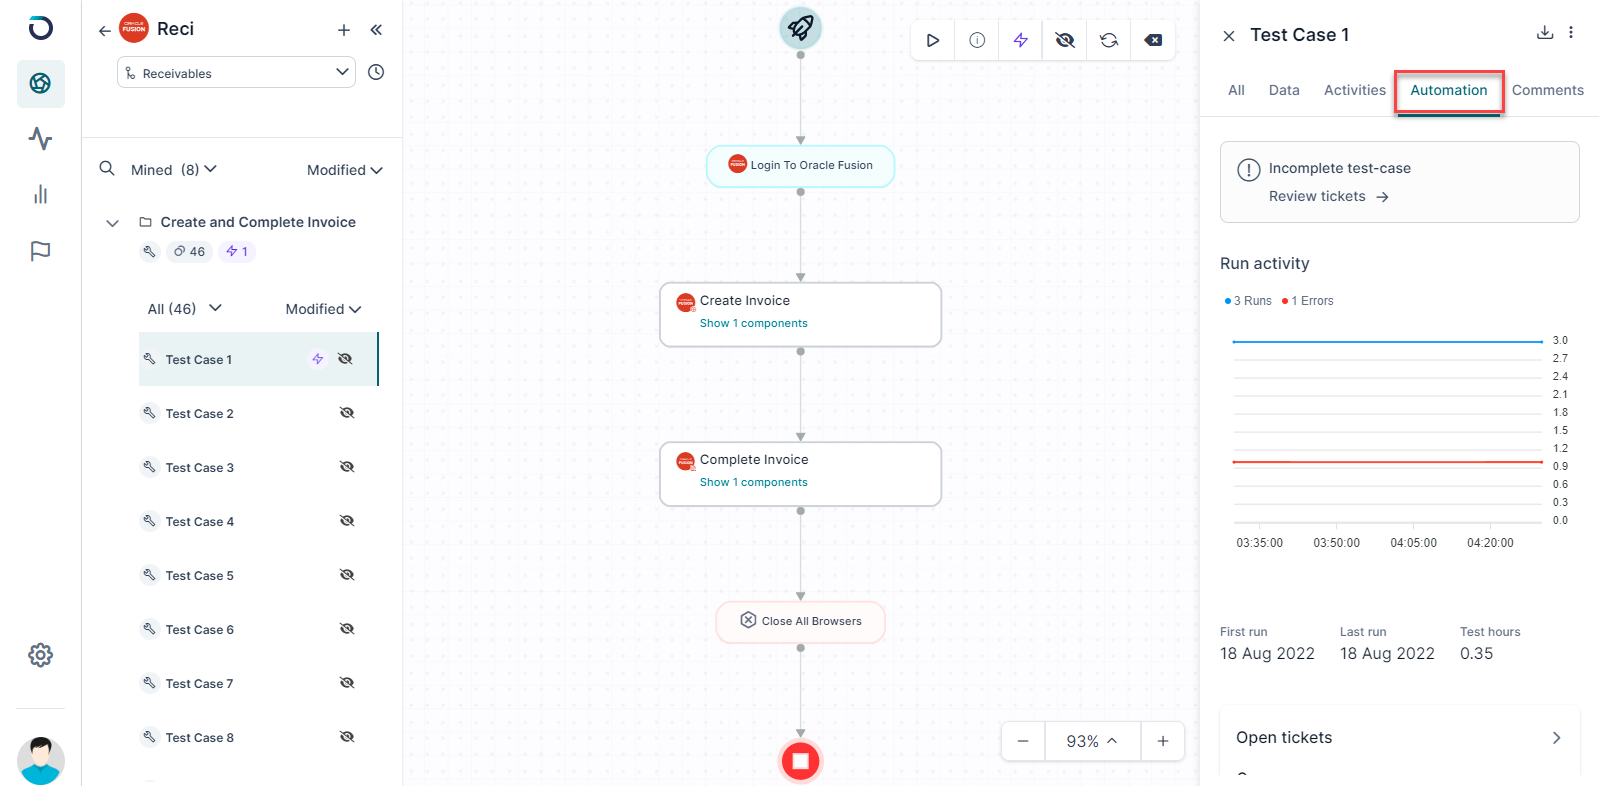
It will also display the details of the First Run, Last Run, and the hours for which they were run.
The below section of Open Tickets will let you view the Open tickets for the processes.
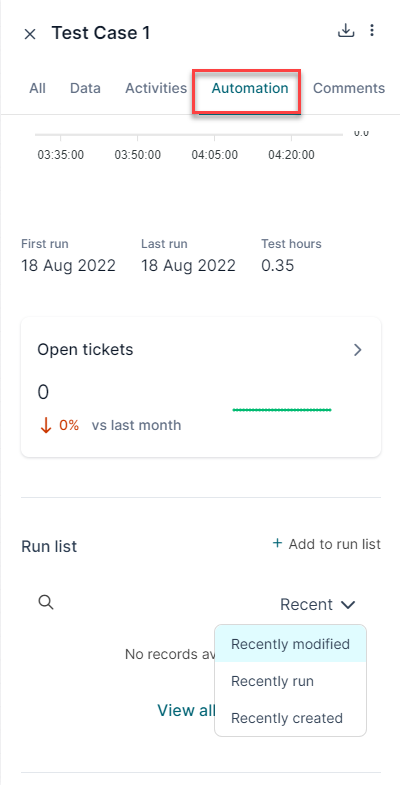
The last section of the Run List will let you add or create a new Run List.
You can create Run List and add a current test case by clicking on the “+” button. With the next button, you can cancel the existing Run List.
You can also search the existing added Run List from the Search Tab.
The next tab is Comments, which will allow you to comment about a particular Test Case.