.png)


As we all know that Opkey is user friendly (easy to use) and provides a unique and rich set of more than 700 keywords to perform test automation. But at times we do come across a scenario where the existing keyword set is not sufficient and need arises to create our own keyword. Users can perform such behaviour using custom keyword. Designing custom keywords is one of the high-level features of Opkey. User can easily add and use custom keyword like other Opkey keywords. Here I am giving an example of creating custom keyword for Opkey Selenium Webdriver Plugin. 1. Custom-keyword without WebDriver's object 2. Custom-keyword using WebDriver's object Steps to create custom keywords:-
Inside Eclipse select the menu item File > New > Java Project to open the New Java Project wizard.
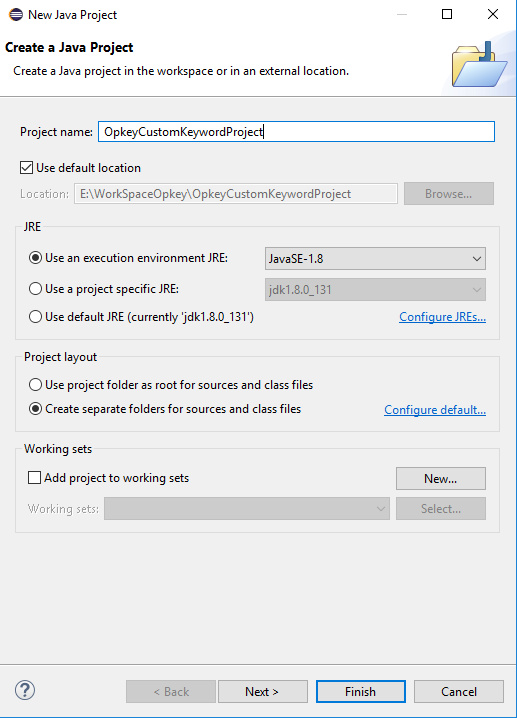
- Type "OpkeyCustomeKeywordProject" in the Project name field. Then click on Next and then Finish.
- Create new folder in the Package Explorer “src” folder.
- Type “WebdriverFiles” in Folder name. Then click on Finish button.
- Get the file “opkey-pluginbase-x.y.jar” ,” webdriverplugin-a.b.jar”, "selenium-p.q.r" placed in the plugin folder, whose default location is as below
NOTE : 'x.y' or 'a.b' or 'p.q.r' all represents respective files version. E.g. webdriverplugin-1.03.jar
- Window -x86 (Xp/7 /8 and above)
C:Program FilesCresTechOpkeyExecution AgentAgentDataPluginsSelenium WebDriver
- Window -x 64 (7 /8 and above)
C:Program Files (x86)CresTechOpkeyExecution AgentAgentDataPluginsSelenium WebDriver
For BPT/Team ( version 5.07 and below) and Personal ( version 2.02 and below)
- Window 7
- BPT/Team : C:ProgramDataAgentDataPluginsSelenium WebDriver
- Personal : C:ProgramDataCresTechOpkeyAgentAgentDataPluginsSelenium WebDriver
- Window Xp
- BPT/Team : C:Documents and SettingsAll UsersApplication DataAgentDataPluginsSelenium WebDriver
- Personal : C:Documents and SettingsAll UsersApplication DataCresTechOpkeyAgentAgentDataPluginsSelenium WebDriver
- Copy “opkey-pluginbase-x.y.jar” ,” webdriverplugin-a.b.jar” and paste these files to the created “WebdriverFiles” folder above.
- Explore “WebdriverFiles” and select “opkey-pluginbase-x.y.jar” ,” webdriverplugin-a.b.jar”, "selenium-p.q.r" files. Then add these files in build Path by right click on these file and select Build Path >Add to Build Path.
- Select the menu item File > New > Class to open New Java Class wizard.
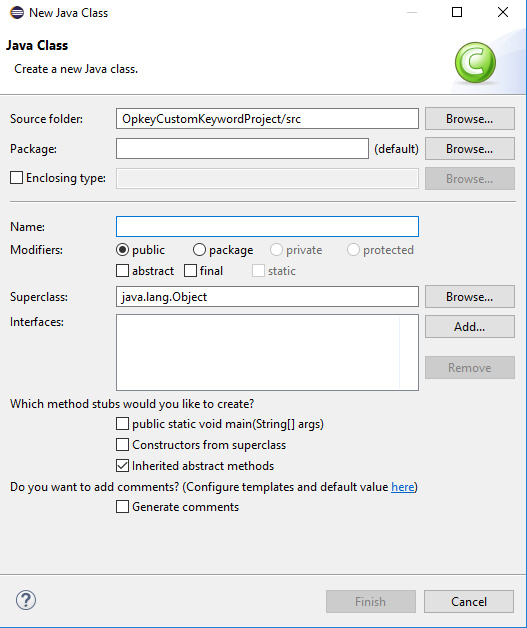
Type class name “CustomeKeyword” in name. Click on Finish button. Now you are ready to create CustomeKeyword.
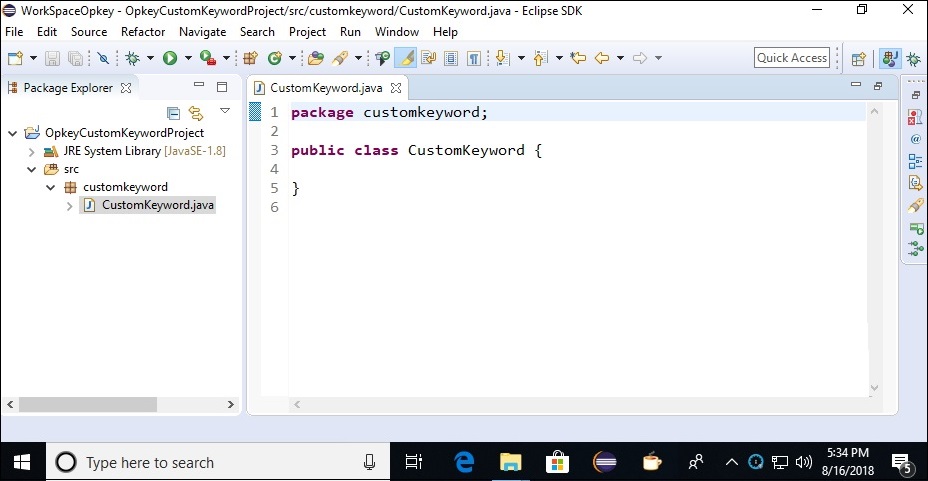
Import com.crestech.opkey.plugin.KeywordLibrary;
import com.crestech.opkey.plugin.ResultCodes;
import com.crestech.opkey.plugin.communication.contracts.functionresult.FunctionResult;
import com.crestech.opkey.plugin.communication.contracts.functionresult.Result;
public class CustomeKeyword implements KeywordLibrary
{
public FunctionResult compareTwoString(String str1,String str2)
{
if (str1.equalsIgnoreCase(str2))
{//Pass
return Result.PASS().setOutput(true).make();
} else
{
//Fail return Result.FAIL(ResultCodes.ERROR_ARGUMENT_DATA_INVALID).setMessage("Both strings are not equal") .make();}} }str1,str2 : Input Parameter.
/*Note:
* In FAIL case: mandatory
-setResultCode(ResultCodes.ERROR_VERIFICATION_FAILLED.Code())
-setMessage("Both strings are not equal")
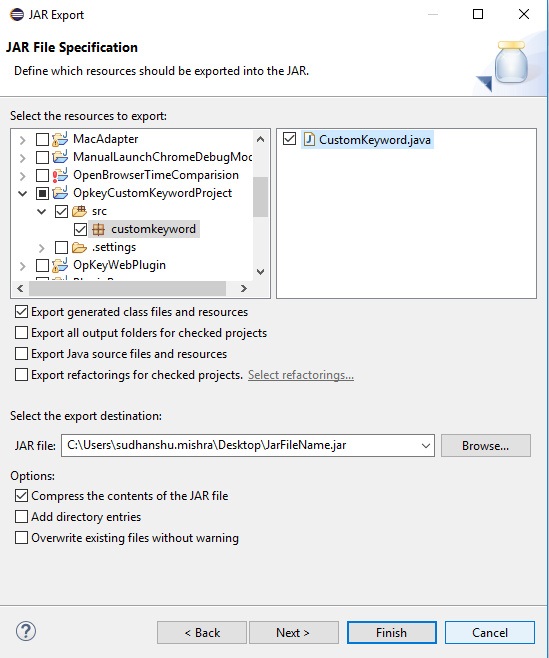
Rest all are optional in both PASS or FAIL case */ Export CustomeKeyword Class -Right click on CustomeKeyword class under Package Explorer and select the Export option to open Export wizard -Explore Java folder and select JAR file then click on Next button to open JAR Export wizard.
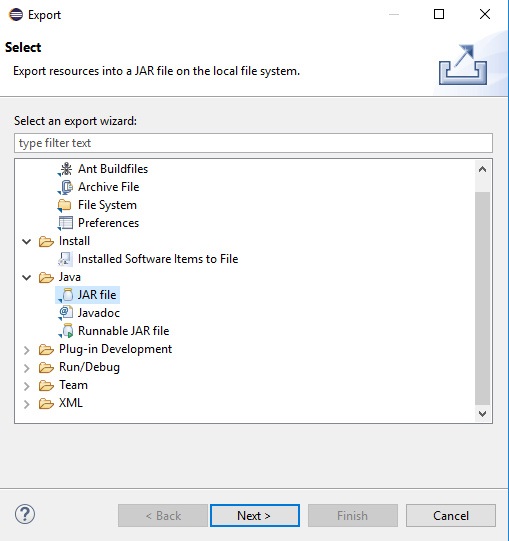
Click on Browse button to select the export destination. Then click on Next->Next->Finish button. Now you are ready to add custom Keyword in Opkey.
- Under Tool menu select Keyword Management Wizard to Open Keyword Management Wizard
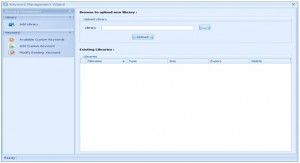
- Upload the specific custom keyword jar using the browse button. Then click on the upload button to upload the file in Opkey.
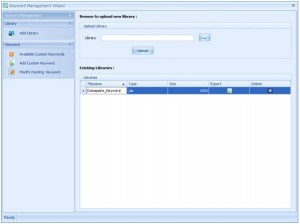
Click on Add Custom Keyword to create Custom keyword.
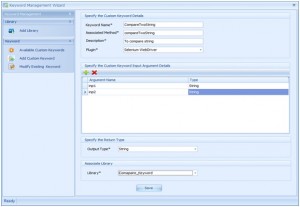
Keyword name : Give the name of your keyword.
Associated name : Name should be same as provided on you jar file function name.
Description : Description of your keyword.
Plug-in : Select the Selenium Webdriver plugin.
Input argument details : Argument should be in same order as provided in function.
Output type : Should be same as your function.
Library : Select Library (jar file) from drop down list.
Then click on Save button to save the custom keyword. Custom Keyword is added in Opkey. Now we can use custom keyword. Use of custom Keyword in Opkey Navigate to Test Case module and add new test step.
- Click on keyword cell.
- Click on Selenium Webdriver tab. From drop-down list of keyword select custom keyword.
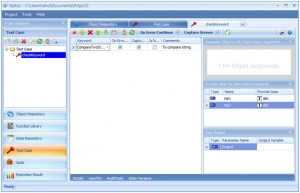
- On the right hand side provide the input argument value.
- Navigate to Suite and add Test Case.
- Run this suite.
Case 1:- Both string are equal.
Inp1 = abc
Inp2=abc
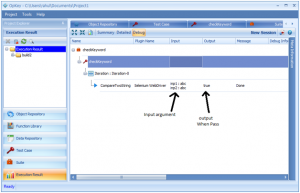
Code: return Result.PASS().setOutput(true).make();
setOutput(true) :- show on result Output column.
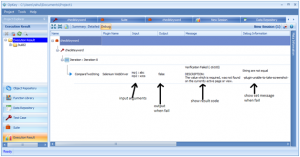
Case 2:- When input argument strings are not equal.
Inp1 = abc
Inp2 = xzcs
Code:
//return Result.FAIL().setOutput(false).setMessage("Both strings are not equal").setResultCode(ResultCodes.ERROR_VERIFICATION_FAILLED.Code()).make();
setOutput(false):- show on result Output column cwindow.
setResultCode(ResultCodes.ERROR_VERIFICATION_FAILLED.Code()):- show on result message column.
setMessage("String are not equal"):- Show on result Debug Information column.
As seen this Opkey feature is quite useful and provides flexibility to its user to create their own keywords as the need arises. It’s easy and friendly GUI provides a hassle free platform to add and use the created custom keyword. Example custom-keyword using WebDriver's object:
Classical Webdriver Approach
public class Custom {
static WebDriver driver;
public static void main(String args){
driver = new FirefoxDriver();
driver.get("http://www.google.com");
}
public static String customTypeText(String strLocator, String text){
WebElement foundElement = driver.findElement(By.name(strLocator));
foundElement.sendKeys(text);
return "Successfully typed Text ";
}
}
Opkey Custom Keyword Approach
public class Custom implements KeywordLibrary {
public FunctionResult customTypeText(String strLocator, String text) throws ToolNotSetException{
WebDriver driver = (WebDriver) Context.session.getTool();
WebElement foundElement = driver.findElement(By.name(strLocator));
foundElement.sendKeys(text);
return Result.PASS().setMessage("Successfully typed Text").make();
}
}
.jpg)